Creating a table of content automatically in Word involves the following two steps:
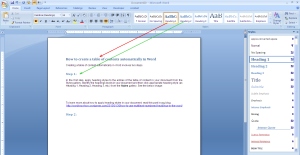
For example, to apply first level heading, select the text in your document and then click style Heading 1 from the Styles gallery. See below:

Click the Reference tab from the Ribbon and then under group Table of Contents, click the icon Table of Contents. From the bottom of the drop-down list, click Insert Table of Contents . See below image:

On clicking Insert Table of Contents, the dialog box Table of Contents appears. Now, do the following in the dialog box:

Click OK. Table of Content is generated in the cursor position.
(More about Table of Contents in Word read the following article:Click Here>>> )
Watch Videos Here
Step 1:
1. Identify the texts in your document that you intend to highlight as headings and then apply appropriate heading styles from the Styles gallery.For example, to apply first level heading, select the text in your document and then click style Heading 1 from the Styles gallery. See below:

Step 2:
Once you are done applying heading styles to all the heading levels in your document, place the mouse cursor where you want to generate the table of content.Click the Reference tab from the Ribbon and then under group Table of Contents, click the icon Table of Contents. From the bottom of the drop-down list, click Insert Table of Contents . See below image:

On clicking Insert Table of Contents, the dialog box Table of Contents appears. Now, do the following in the dialog box:
- Select a Tab Leader type from the drop-down list.
- Select a format for the table of content from the drop-down list Formats.
- Select the number of heading levels to be included in the table of contents from the Show Levels spin box.
- Click the Options button from the right bottom corner to include/exclude heading styles to build a customized table of content.

Click OK. Table of Content is generated in the cursor position.
(More about Table of Contents in Word read the following article:Click Here>>> )
Watch Videos Here
Other Website talk about how to create Table content Automatically
1). Word Tips: How to Create a Table of Contents in Word
2). Create A Table Of Contents — Word 2011 (mac)
Learn More about Create Auto Table contents by slide
How to manage the table of contents with one click (Microsoft Word 2007) - for report and thesis from Chia Siew Lian
Comments
Post a Comment
Type what are you thinking here?